In this example, I have explained how to download multiple file as ZIP archive in MVC Razor using DotNetZIP / Ionic.Zip or you can say, how to download multiple file as ZIP file in ASP.NET MVC C#.
Let's begin by creating a new Project in your Visual Studio, navigate to File->New Project -> Select "Web" from left pane and Select "ASP.NET Web-application" from right pane-> Give it a name ("ZIPFileInMVC")-> Click "OK"-> Select "MVC" template to generate all the required routing and basic CSS/JS files -> Click OK.
Once we have the basic MVC project template, We would need to install DotNetZip library using Nuget Package manager, we will be using this library for downloading files as a zip in ASP.NET MVC.
So, go to Tools->Nuget Package Manager -> Nuget Package Manager console, and using the below command
PM> Install-Package DotNetZip -Version 1.13.0
Once we have all the files installed, right click on the "Models" folder, and create a class file "FileModel.cs" inside it.
namespace ZIPFileInMVC.Models
{
    public class FileModel
    {
        public string FileName { get; set; }
        public string FilePath { get; set; }
        public bool IsSelected { get; set; }
    }

}
We will be using this Model to get selected files in the ActionMethod.
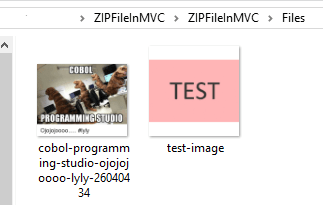
For demo use, we will be creating a new Folder inside the project "Files" and place two example image in this folder

Now, inside your HomeController.cs, use the code below
using Ionic.Zip;
using System;
using System.Collections.Generic;
using System.IO;
using System.Web.Mvc;
using ZIPFileInMVC.Models;

namespace ZIPFileInMVC.Controllers
{
    public class HomeController : Controller
    {
        public ActionResult Index()
        {
            string[] filePaths = Directory.GetFiles(Server.MapPath("~/Files/"));
            List<FileModel> files = new List<FileModel>();
            foreach (string filePath in filePaths)
            {
                files.Add(new FileModel()
                {
                    FileName = Path.GetFileName(filePath),
                    FilePath = filePath
                });
            }

            return View(files);
        }

        [HttpPost]
        public ActionResult Index(List<FileModel> files)
        {
            using (ZipFile zip = new ZipFile())
            {
                zip.AlternateEncodingUsage = ZipOption.AsNecessary;
                zip.AddDirectoryByName("Files");
                foreach (FileModel file in files)
                {
                    if (file.IsSelected)
                    {
                        zip.AddFile(file.FilePath, "Files");
                    }
                }
                string zipName = String.Format("FilesZip_{0}.zip", DateTime.Now.ToString("yyyy-MMM-dd-HHmmss"));
                using (MemoryStream memoryStream = new MemoryStream())
                {
                    zip.Save(memoryStream);
                    return File(memoryStream.ToArray(), "application/zip", zipName);
                }
            }


        }
    }
}
The POST action method handles the POST operation and when the form is submitted, forms also submits the "FileModel" generic list and names of the files which is selected, which we will be using later.
First an object of the DotNetZip Library is created and a loop is executed over the objects of the received Generic List collection of the FileModel class.
If the IsSelected property is True then the file is included to be downloaded as a ZIP.
At last, the DotNetZip Library object is downloaded as Zip file.
Now, we need to add razor code in "Index.cshtml" page for user to show all the files inside "Files" folder, we will allow them to select files and submit to POST ActionMethod of HomeController.cs and return it as ZIP archieve file
@using ZIPFileInMVC.Models
@model List<FileModel>
@{
    ViewBag.Title = "Home Page";
}
<br />
@using (Html.BeginForm("Index", "Home", FormMethod.Post))
{
    <table class="table table-bordered table-condensed">
        <thead>
            <tr>
                <th></th>
                <th>File Naame</th>
            </tr>
       </thead>
        <tbody>
            @for (int i = 0; i < Model.Count(); i++)
            {
                <tr>
                    <td>@Html.CheckBoxFor(m => m[i].IsSelected)</td>
                    <td>
                        @Model[i].FileName
                        @Html.HiddenFor(m => m[i].FilePath)
                        @Html.HiddenFor(m => m[i].FileName)
                    </td>
                </tr>
            }
         </tbody>
    </table>
    <br />
    <input type="submit" value="Download Selected file as ZIP" />
}
That's it, we are done, now build and open it in your browser.
Here is the sample gif image

That's it, we are done, feel free to ask questions related to this article in the below comments section.

