
In our previous article, we have provided sample to read excel in C#, but sometimes you may also need to create excel file in C# or in your ASP.NET MVC project, one way of creating it using Microsoft's Office, but in that case you would have to install Microsoft Office on your server, so in this article I will explain to you how you can create excel file without using Office on server using EPPlus.
Create Excel in MVC using EPPlus (Without Interop)
EPPlus is a library to manage Excel spreadsheets. EPPlus is a .NET library, which reads and writes Excel 2007/2010 or higher files, using Open Office XML format. Epplus is a free tool.
Let's get started I will provide you step by step example to create .xlsx file using C# & EPPLus
Step 1: Create a new project in your Visual Studio, open your Visual Studio IDE and navigate to File->New->Project-> ASP.NET Empty Web Application.Name the Project as you like, I named it "CreateExcelUsingMVC", click "OK" & then select MVC template in the new screen.
Step 2: Now, we will install EPPlus in our project, so navigate to Tools-> NuGet Package Manager-> Select "Manage Nuget package for this solution...".
Select the "Browse" tab and search for "EPPlus"

After selecting the Epplus, select the projects in which you want to install the API, and click "Install".
Step 3: Navigate to your project's HomeController and create a new ActionResult method to generate/create excel file using Epplus.
First of all, you would have to create an EPPlus object in our method using which we will create a worksheet
// Create the package and make sure you wrap it in a using statement
using (ExcelPackage excel = new ExcelPackage())
{
     // add a new worksheet to the empty workbook
     ExcelWorksheet worksheet = package.Workbook.Worksheets.Add("TestSheet1");

    // --------- Creating file, Data and styling goes here -------------- //

}
Reference file you would need
using OfficeOpenXml;
using System;
using System.Collections.Generic;
using System.IO;
using System.Web.Mvc;
Now, let's create the file and header row in the file
//Create Excel file in Uploads folder of your project
                FileInfo excelFile = new FileInfo(Server.MapPath("~/ExcelFile/test.xlsx"));

                //Add header row columns name in string list array
                var headerRow = new List<string[]>()
                  {
                    new string[] { "Full Name","Email" }
                  };

                // Get the header range
                string Range = "A1:" + Char.ConvertFromUtf32(headerRow[0].Length + 64) + "1";

                // get the workSheet in which you want to create header
                var worksheet = excel.Workbook.Worksheets["TestSheet1"];

                // Popular header row data
                worksheet.Cells[Range].LoadFromArrays(headerRow);
I have explained each line of code using comment's in the above code, basically, here is what we are doing
- Create the excel file
- Create a list of header row using List
- Select the Header range using "Range"
- Get the Worksheet
- Load header in the excel sheet "TestSheet1" using HeaderRow created in the second step.
Complete code till now will be as below
using (ExcelPackage excel = new ExcelPackage())
{
//Add Worksheets in Excel file
excel.Workbook.Worksheets.Add("TestSheet1");
//Create Excel file in Uploads folder of your project
FileInfo excelFile = new FileInfo(Server.MapPath("~/ExcelFile/test.xlsx"));
//Add header row columns name in string list array
var headerRow = new List<string[]>()
{
new string[] { "Full Name","Email" }
};
// Get the header range
string Range = "A1:" + Char.ConvertFromUtf32(headerRow[0].Length + 64) + "1";
// get the workSheet in which you want to create header
var worksheet = excel.Workbook.Worksheets["TestSheet1"];
// Popular header row data
worksheet.Cells[Range].LoadFromArrays(headerRow);
//Save Excel file
excel.SaveAs(excelFile);
}
byte[] fileBytes = System.IO.File.ReadAllBytes(Server.MapPath("~/ExcelFile/test.xlsx"));
string fileName = "test.xlsx";
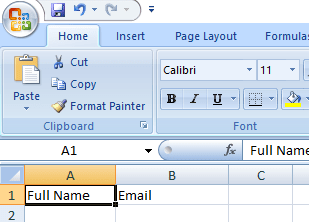
return File(fileBytes, System.Net.Mime.MediaTypeNames.Application.Octet, fileName);Building project and executing it, gives me excel file as below
For styling header rows we can write C# code as below
worksheet.Cells[Range].Style.Font.Bold = true;
worksheet.Cells[Range].Style.Font.Size = 16;
worksheet.Cells[Range].Style.Font.Color.SetColor(System.Drawing.Color.DarkBlue);
To load the data into our excel file we can load data from the database as DataSet or we can create custom array List Object and then add the data
              //Now add some data in rows for each column
                var Data = new List<object[]>()
                    {
                      new object[] {"Test","test@gmail.com"},
                      new object[] {"Test2","test2@gmail.com"},
                      new object[] {"Test3","test3@gmail.com"},

                    };
        //add the data in worksheet, here .Cells[2,1] 2 is rowNumber while 1 is column number
                worksheet.Cells[2, 1].LoadFromArrays(Data);
So, the complete code of your ActionMethod in the controller will be as below
 public ActionResult CreateExcel()
        {
            using (ExcelPackage excel = new ExcelPackage())
            {

                //Add Worksheets in Excel file
                excel.Workbook.Worksheets.Add("TestSheet1");


                //Create Excel file in Uploads folder of your project
                FileInfo excelFile = new FileInfo(Server.MapPath("~/ExcelFile/test.xlsx"));

                //Add header row columns name in string list array
                var headerRow = new List<string[]>()
                  {
                    new string[] { "Full Name","Email" }
                  };

                // Get the header range
                string Range = "A1:" + Char.ConvertFromUtf32(headerRow[0].Length + 64) + "1";

                // get the workSheet in which you want to create header
                var worksheet = excel.Workbook.Worksheets["TestSheet1"];

                // Popular header row data
                worksheet.Cells[Range].LoadFromArrays(headerRow);

                //show header cells with different style
                worksheet.Cells[Range].Style.Font.Bold = true;
                worksheet.Cells[Range].Style.Font.Size = 16;
                worksheet.Cells[Range].Style.Font.Color.SetColor(System.Drawing.Color.DarkBlue);

                //Now add some data in rows for each column
                var Data = new List<object[]>()
                    {
                      new object[] {"Test","test@gmail.com"},
                      new object[] {"Test2","test2@gmail.com"},
                      new object[] {"Test3","test3@gmail.com"},

                    };

                //add the data in worksheet, here .Cells[2,1] 2 is rowNumber while 1 is column number
                worksheet.Cells[2, 1].LoadFromArrays(Data);

                //Save Excel file
                excel.SaveAs(excelFile);
            }
            byte[] fileBytes = System.IO.File.ReadAllBytes(Server.MapPath("~/ExcelFile/test.xlsx"));
            string fileName = "test.xlsx";

            return File(fileBytes, System.Net.Mime.MediaTypeNames.Application.Octet, fileName);
        }
Navigate to Index.cshtml in View->Home-> Index.cshtml and add the Razor code to download the file
@{
    ViewBag.Title = "Home Page";
}

<br />

@Html.ActionLink("Test.xlsx", "CreateExcel", "Home")
Build your MVC project and try to download the "Test.xlsx" file, here is my local project's output in Gif image
Create Excel in Console application using NPOI (Without Interop)
In the above example, we are using EPPlus Library, now we will use NPOI, which is free to use and can be used in .NET Core 2.0 or above OR in .NET Framework 4.0 of above.
First, install NPOI using Nuget package in your Console application, by using Below command in NuGet package manager console
Install-Package NPOINow, before we create excel, we may need to create a extra function to add a excel cell using NPOI
 public static void CreateCell(IRow CurrentRow, int CellIndex, string Value, HSSFCellStyle Style)
        {
            ICell Cell = CurrentRow.CreateCell(CellIndex);
            Cell.SetCellValue(Value);
            Cell.CellStyle = Style;
        }
So, we can now directly create a new cell in NPOI by calling above method "CreateCell()"
Now, to create a .xlsx file we will use the below code
IWorkbook workbook = new XSSFWorkbook();and now, we will have to add a "Sheet" in Workbook, without which our excel will be blank, so to add a Sheet in workbook, we can use below C# code
ISheet sheet = workbook.CreateSheet("My sheet");You can add style for Header cells, as below
   XSSFFont HeaderFonts = (XSSFFont)workbook.CreateFont();
            HeaderFonts.FontHeightInPoints = 14;
            HeaderFonts.FontName = "Arial";
            HeaderFonts.IsBold = true; //make cell bold

            //create cellStyle
            XSSFCellStyle cellStyle = (XSSFCellStyle)workbook.CreateCellStyle();
            cellStyle.SetFont(HeaderFonts);
Now, add values in Excel Cell using CreateCell Method
  //Create The Headers of the excel
            IRow HeaderRow = sheet.CreateRow(0);

            //Create The Actual Cells
            CreateCell(HeaderRow, 0, "Email", cellStyle);
            CreateCell(HeaderRow, 1, "Full Name", cellStyle);
Note: In above as we are creating .xlsx file, that's why we were using "NPOI.XSSF.UserModel", if you want to create .xls file replace "XSSF" with "HSSF" in all areas of code, so for example "
XSSFFont BasicFonts = (XSSFFont)workbook.CreateFont();" will become "HSSFFont BasicFonts = (HSSFFont)workbook.CreateFont();"
Here is the complete C# code for console application
using NPOI.SS.UserModel;
using NPOI.XSSF.UserModel;
using System.IO;

namespace WriteToExcelCsharp
{
    class Program
    {
        static void Main(string[] args)
        {
            IWorkbook workbook = new XSSFWorkbook(); //create .xlsx file

            //create a sheet in excel workbook
            ISheet sheet = workbook.CreateSheet("My sheet");

            XSSFFont HeaderFonts = (XSSFFont)workbook.CreateFont();
            HeaderFonts.FontHeightInPoints = 14;
            HeaderFonts.FontName = "Arial";
            HeaderFonts.IsBold = true; //make cell bold

            //create cellStyle
            XSSFCellStyle cellStyle = (XSSFCellStyle)workbook.CreateCellStyle();
            cellStyle.SetFont(HeaderFonts);

            //Create The Headers of the excel
            IRow HeaderRow = sheet.CreateRow(0);

            //Create The Actual Cells
            CreateCell(HeaderRow, 0, "Email", cellStyle);
            CreateCell(HeaderRow, 1, "Full Name", cellStyle);


            //basic Font style for all other rows
            XSSFFont BasicFonts = (XSSFFont)workbook.CreateFont();
            BasicFonts.FontHeightInPoints = 14;
            BasicFonts.FontName = "Arial";
            BasicFonts.IsBold = false;

            XSSFCellStyle basiccellStyle = (XSSFCellStyle)workbook.CreateCellStyle();
            basiccellStyle.SetFont(BasicFonts);

            //add five rows with two columns
            // column1 = email
            //column 2 = name
            for (var i=0; i < 5; i++)
            {
                IRow row = sheet.CreateRow(i+1);

                //add values in cell
                CreateCell(row, 0, "name"+i+"@gmail.com", basiccellStyle);
                CreateCell(row, 1, "Name"+i, basiccellStyle);
            }

            //saving excel file
            using (FileStream stream = new FileStream("D:\\NpoiExcel.xlsx", FileMode.Create, FileAccess.Write))
            {
                workbook.Write(stream);
            }
        }

        public static void CreateCell(IRow CurrentRow, int CellIndex, string Value, XSSFCellStyle Style)
        {
            ICell Cell = CurrentRow.CreateCell(CellIndex);
            Cell.SetCellValue(Value);
            Cell.CellStyle = Style;
        }

    }
}
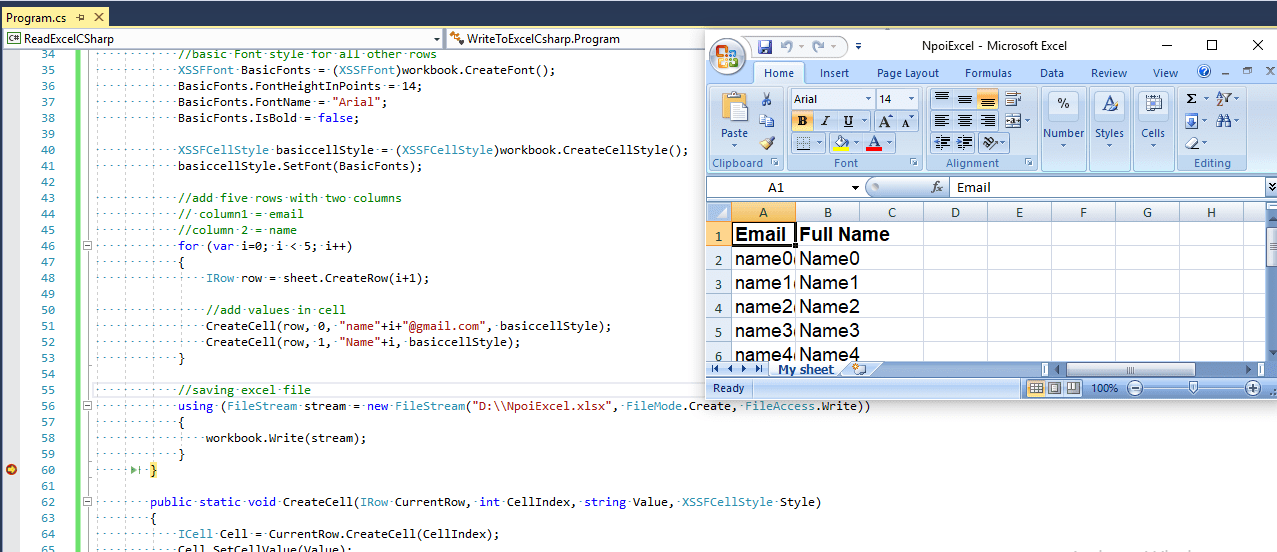
You will see a new .xlsx file is created in "D:\NpoiExcel.xlsx" location, here is the output file image with code
That's it, we are done.
You can also load data from database using an Epplus method for that you can read the Export data to excel (.xlsx & .xls) file using ASP.NET MVC C# article.
If you have any questions, feel free to ask it in the below comment's section or in question's section.
 Buy us a coffee
 Become a Patron