
In one of our previous posts, we can have described how to send email in asp.net mvc using C# with attachments using smtp service, so now in this post, I have explained how you can use MVC Mailer Nuget Package in your application to send email. MVC Mailer is new component that is used for sending emails in ASP.NET MVC Framework. It Uses Razor View Engine view as email template.
Why MVC Mailer?
- Write clean code to send emails instead of spaghetti code.
- Reuse the power of master pages/Layout, Views and data.
- Easily write unit test for email sending code.
- Send multi-part emails.
So here is the step by step procedure of sending email in Asp.Net MVC using MVCMailer:
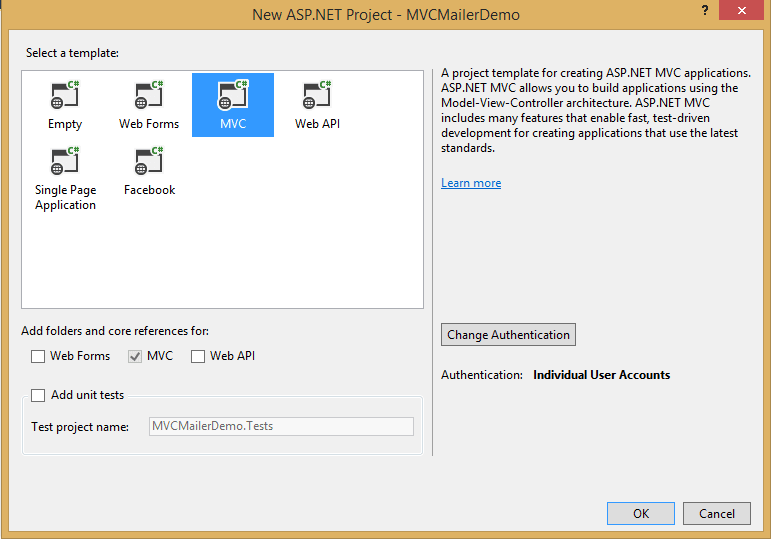
1 .Create a new project in your Visual Studio(File-> New->Project->From web(Left pane)-> Select "Asp.Net Web Application"(right pane)) .
a) Enter a Name, Click "Ok"
b) Select "MVC" template from project and click "Ok"

Once you have entered the project name, select Template
2. Install MVCMailer Nuget Package :
In your new Project, Install this package for MVC Mailer, using Nuget Package manager(For Nuget Package manager console,
browse Tools-> Nuget Package Manager-> Nuget package manager console) console, then enter these commands :
Install-Package MvcMailerAfter running this command, default email templates will be installed in your project.
The log should be as follows :
Added MvcMailer output 'Mailers\IUserMailer.cs'
Added MvcMailer output 'Mailers\UserMailer.cs'
Added MvcMailer output 'Views\UserMailer\_Layout.cshtml'
Added MvcMailer output 'Views\UserMailer\Welcome.cshtml'
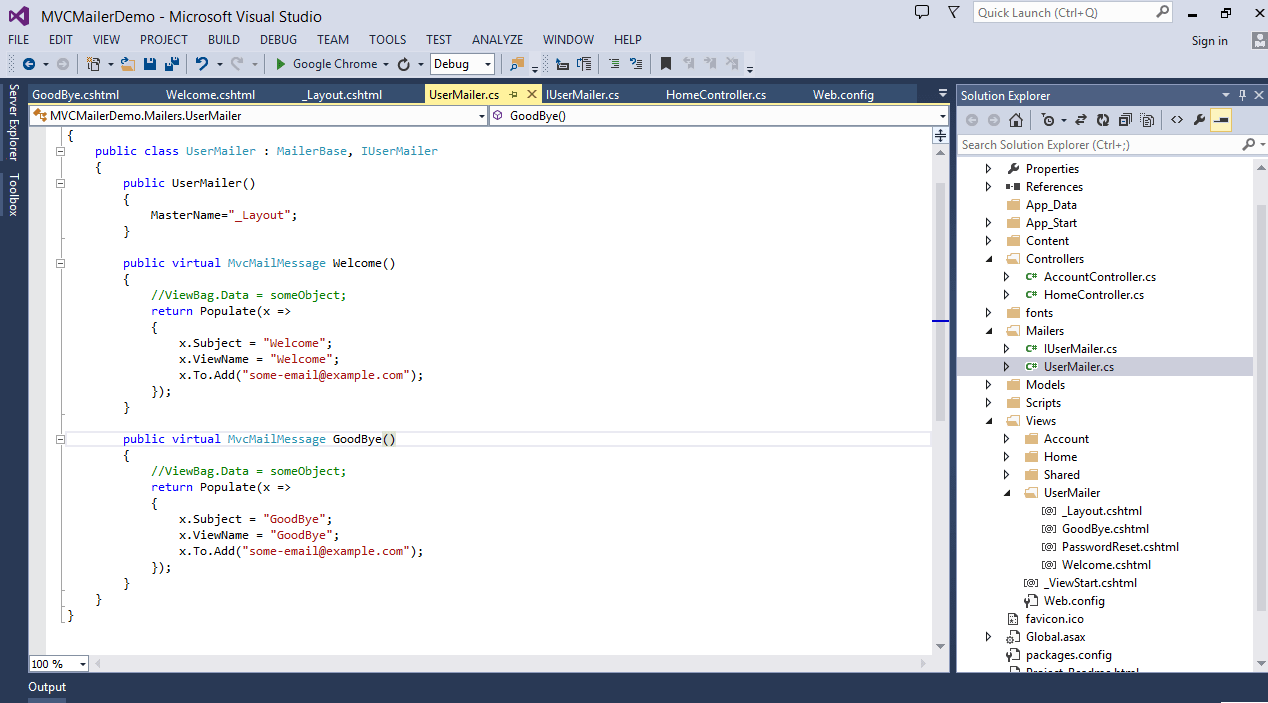
Added MvcMailer output 'Views\UserMailer\PasswordReset.cshtml'Here is an example of Welcome & GoodBye Views :
Run following command through PackageManager Console to install template of Welcome & GoodBye messages:
Scaffold Mailer UserMailer Welcome,GoodBye –ForceAdded MvcMailer output 'Mailers\IUserMailer.cs'
Added MvcMailer output 'Mailers\UserMailer.cs'
Added MvcMailer output 'Views\UserMailer\_Layout.cshtml'
Added MvcMailer output 'Views\UserMailer\Welcome.cshtml'
Added MvcMailer output 'Views\UserMailer\GoodBye.cshtml'3. Setup Email Settings & Email templates:
Once you’ve installed MvcMailer, if you open web.config you will see it already have setup default mail settings.
<system.net>
		<mailSettings>
			<!-- Method#1: Configure smtp server credentials -->
			<smtp from="some-email@gmail.com">
				<network enableSsl="true" host="smtp.gmail.com" port="587" userName="some-email@gmail.com" password="valid-password" />
			</smtp>

			<!-- Method#2: Dump emails to a local directory -->
			<!--
			<smtp from="some-email@gmail.com" deliveryMethod="SpecifiedPickupDirectory">
				<network host="localhost" />
				<specifiedPickupDirectory pickupDirectoryLocation="c:\temp\"/>
			</smtp>
			-->
		</mailSettings>
	</system.net>
Replace your SMTP Settings as valid username & password of your gmail account .
4. Test Emails with writing out to Temp Folder :
If you don’t want to set up SMTP, you can easily switch to write emails out to C:\temp folder by commenting the SMTP block in web.config and use the Method#2 as shown in the above web.config file
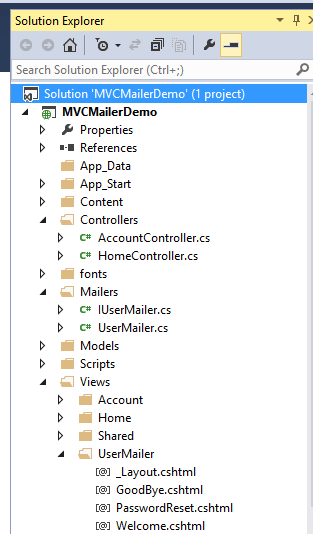
5.You can see some of the views generated by MVCMailer, you can expand folder structure as follows :
a. Views - > UserMailer
b. Mailers -> IUserMailer Interface and UserMailer Class with implementation for Welcome & Goodbye mail templates as follows :
6. Send Emails :
To send email ,create new controller (HomeController)-> and create view
(Index) for the same.
To send email, use the following code :
a. Home Controller:
  public ActionResult Index()
        {
            IUserMailer mailer = new UserMailer();
            mailer.Welcome().Send();
            return View();
        }
b.Add following namespace :
using MVCMailerDemo.Mailers;c. Change the code of UserMailer.cs as follows:
public virtual MailMessage Welcome()
		{


            var mailMessage = new MailMessage { Subject = "Welcome" };

            mailMessage.To.Add("Your Email ID");
            ViewBag.Name = "Snehal Sawant";
            PopulateBody(mailMessage, viewName: "Welcome");
            return mailMessage;
		}
7. Pass data to Email Template :
You can pass data to Email Template using ViewBag,ViewData,TempData and Strongly Typed Model .
8. Layout.cshtml :
<html>
<head>
    <style type="text/css">
        div {
            font-family: Verdana, Arial, Sans-Serif;
            font-size: 10px;
        }

        #mail-message {
            padding: 10px;
        }

        #mail-footer {
            padding: 10px;
        }
    </style>
</head>
<body>
    <div id="mail-message">
        @RenderBody()
    </div>
    <div id="mail-footer">
        Best Regards,<br />
        <a href="http://www.mywebsite.com">www.mywebsite.com</a>
    </div>
</body>
</html>
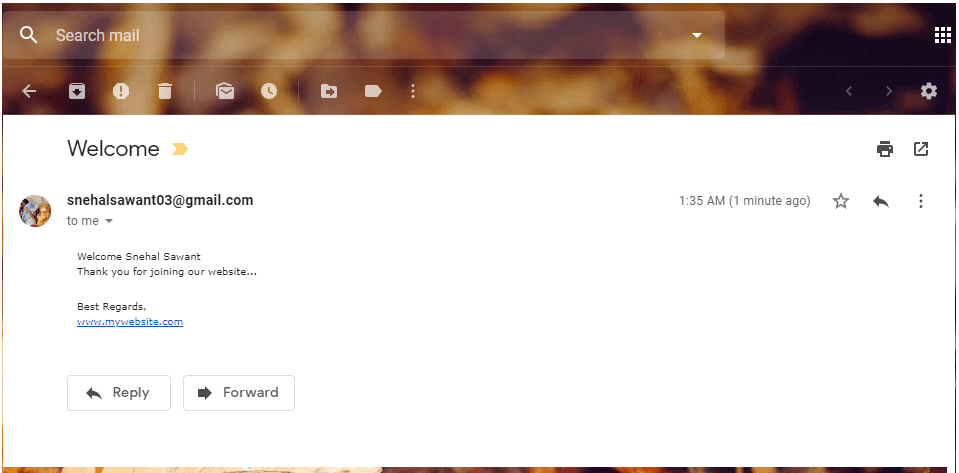
9. Welcome.cshtml :
Welcome @ViewBag.Name
<br />
Thank you for joining our website...
10.Run your application and you will get welcome mail to your account.
11.You can also generate other mail templates available for MVCMailer, using the following Nuget command ,
Scaffold Mailer NotificationMailer FriendRequest,FriendsMessage,Follow,LikedAdded MvcMailer output 'Mailers\INotficationMailer.cs'
Added MvcMailer output 'Mailers\NotficationMailer.cs'
Added MvcMailer output 'Views\NotficationMailer\_Layout.cshtml'
Added MvcMailer output 'Views\NotficationMailer\FriendRequest.cshtml'
Added MvcMailer output 'Views\NotficationMailer\FriendsMessage.cshtml'
Added MvcMailer output 'Views\NotficationMailer\Follow.cshtml'
Added MvcMailer output 'Views\NotficationMailer\Liked.cshtml'PM> Scaffold Mailer NotficationMailer FriendRequest, FriendsMessage, Follow, Liked
Added MvcMailer output 'Mailers\INotficationMailer.cs'
Added MvcMailer output 'Mailers\NotficationMailer.cs'
Added MvcMailer output 'Views\NotficationMailer\_Layout.cshtml'
Added MvcMailer output 'Views\NotficationMailer\FriendRequest.cshtml'
Added MvcMailer output 'Views\NotficationMailer\FriendsMessage.cshtml'
Added MvcMailer output 'Views\NotficationMailer\Follow.cshtml'
Added MvcMailer output 'Views\NotficationMailer\Liked.cshtml'
MvcMailer gives you very clean and easy way for sending email using your ASP.NET MVC web application. By using Views as templates, you can use the powerful Razor to easily create, update and maintain your email templates.
That's it we are done, thank you for reading. You can also download source code from below link :
https://drive.google.com/file/d/1EOtSnxztVXPB4IkDcSkNVNmId2nyRXT2/view
You may also like to read:
Verify email address exists or not? (With email id validation in C#)
 Buy us a coffee
 Become a Patron