
If you have started coding in ASP.NET Core, then you will definitely need to perform file uploading. So in this article, I have provided step by step procedure to upload single or multiple files in asp.net core mvc using new IFormFile, how to save file on server folder and file upload location in the database.
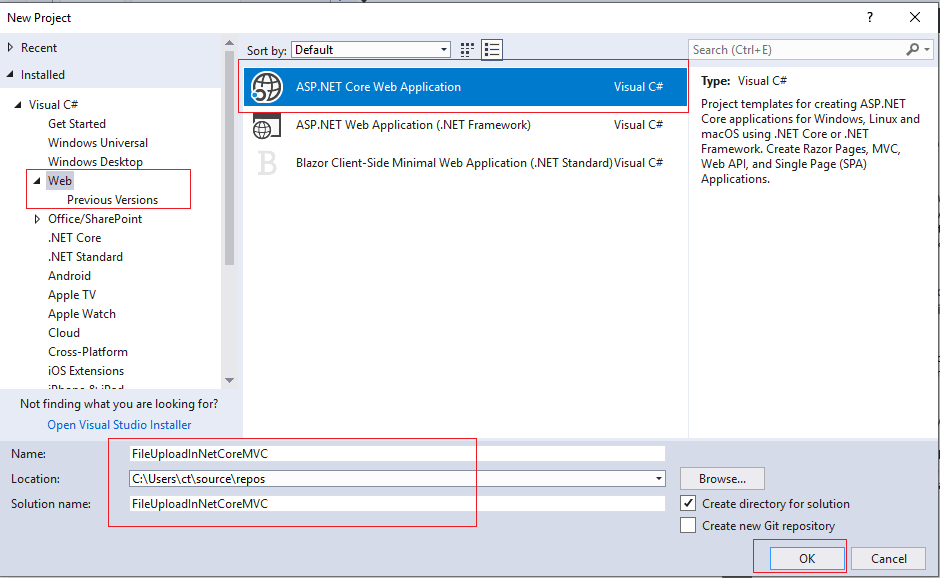
Step 1: First of all, you need to create new project in your Visual Studio, I am using Visual Studio 2017 ( You can use same steps for VS 2022 or .NET Core 6/ .NET Core 8), navigate to File-> New -> Project -> Select "Web" from left pane and "ASP.NET Core Web-Application" from right pane, as shown in the below image
Now, in the next screen, select .NET Core/ASP.NET Core 2 or higher version, also select "Web-Application (Model-View-Controller)" to generate it's default template automatically by VIsual Studio
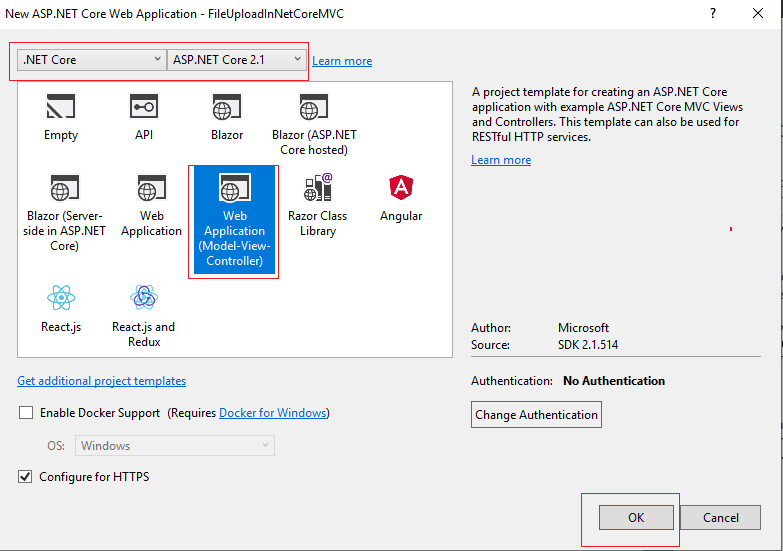
Once done, click "Ok"
Step 2: Navigate to Controllers -> "HomeController.cs" and use the code below
  private IHostingEnvironment _hostingEnv;
        public HomeController(IHostingEnvironment hostingEnv)
        {
            _hostingEnv = hostingEnv;
        }

        [HttpPost]
        public async Task<IActionResult> UploadFile(IFormFile FormFile)
        {

                var filename = ContentDispositionHeaderValue.Parse(FormFile.ContentDisposition).FileName.Trim('"');
                var path = Path.Combine(Directory.GetCurrentDirectory(), "wwwroot", "images", FormFile.FileName);
                using (System.IO.Stream stream = new FileStream(path, FileMode.Create))
                {
                    await FormFile.CopyToAsync(stream);
                }


            return RedirectToAction("Index", "Home");

        }
Inside HomeController we will be using IFormFile, When the form is posted to the server, copy the IFormFile to a stream and save it to physical drive using the stream.
We will also be using, IHostingEnvironment interface, which need to be injected as dependency in the Controller and then later used throughout the Controller.
You will need to include namespaces, in your HomeController.cs
using System.Threading.Tasks;
using Microsoft.AspNetCore.Mvc;
using Microsoft.AspNetCore.Hosting;
using Microsoft.AspNetCore.Http;
using System.Net.Http.Headers;
using System.IO;
The path passed to the FileStream must include the file name. If the file name isn't provided, an UnauthorizedAccessException is thrown at runtime.
Files uploaded using the IFormFile technique are buffered in memory or on disk on the server before processing. Inside the action method, the IFormFile contents are accessible as a Stream.
Step 3: Navigate to "Views"-> "Home" -> "Index.cshtml" and use the below html code with asp.net core tags, to submit file to "HomeController" and "UploadFile" ActionMethod
@{
    ViewData["Title"] = "Home Page";
}

<form enctype="multipart/form-data" method="post" asp-controller="Home" asp-action="UploadFile">
    <dl>
        <dt>
            <label>Upload</label>
        </dt>
        <dd>
            <input type="file" name="FormFile" id="FormFile">

        </dd>
    </dl>
    <input class="btn" type="submit" value="Upload" />
</form>
Where asp-controller =name of controller, to submit form
asp-action= name of action method to call, when form is submitted
also, do not forget to add 'enctype="multipart/form-data"', this is the line of html code, which allows us to submit file to back-end controller.
Now, you can build your project and run it on browser, and try to upload file, here is the sample gif of output, in which I tried to upload file.
You can find your uploaded file at the location "wwwroot"->"images"->yourfile of your project solution, as shown in the above gif.
Uploading Multiple files in ASP.NET Core MVC
To Upload multiple files, navigate to "HomeController.cs" and now in the arguments we will take multiple files using "List<IFormFile>" and we will loop through each file to save it on physical drive.
        [HttpPost]
        public async Task<IActionResult> UploadFile(List<IFormFile> FormFile)
        {
            long size = FormFile.Sum(f => f.Length);

            foreach (var formFile in FormFile)
            {
                if (formFile.Length > 0)
                {
                    var filePath = Path.GetTempFileName();

                    using (var stream = System.IO.File.Create(filePath))
                    {
                        await formFile.CopyToAsync(stream);
                    }
                }
            }

            return RedirectToAction("Index", "Home");

        }
On the Index.cshtml View, we will use HTML 5 attribute "multiple" for file type input
<input type="file" name="FormFile" id="FormFile" multiple />Complete Index.cshtml code
@{
    ViewData["Title"] = "Home Page";
}

<form enctype="multipart/form-data" method="post" asp-controller="Home" asp-action="UploadFile">
    <dl>
        <dt>
            <label>Upload</label>
        </dt>
        <dd>
            <input type="file" name="FormFile" id="FormFile" multiple />

        </dd>
    </dl>
    <input class="btn" type="submit" value="Upload"  />
</form>
here is the output when I debug the code and try to upload multiple files in asp.net core mvc
As you can see in the above GIF, we are able to upload multiple file at once and get it in C# ASP.NET Core Controller side.
You can download the sample project which has multiple file upload sample.
You may also like to read:
File uploading using DropZone js & HTML5 in MVC
File Upload in ASP.NET MVC (Single and Multiple files upload example)
 Buy us a coffee
 Become a Patron