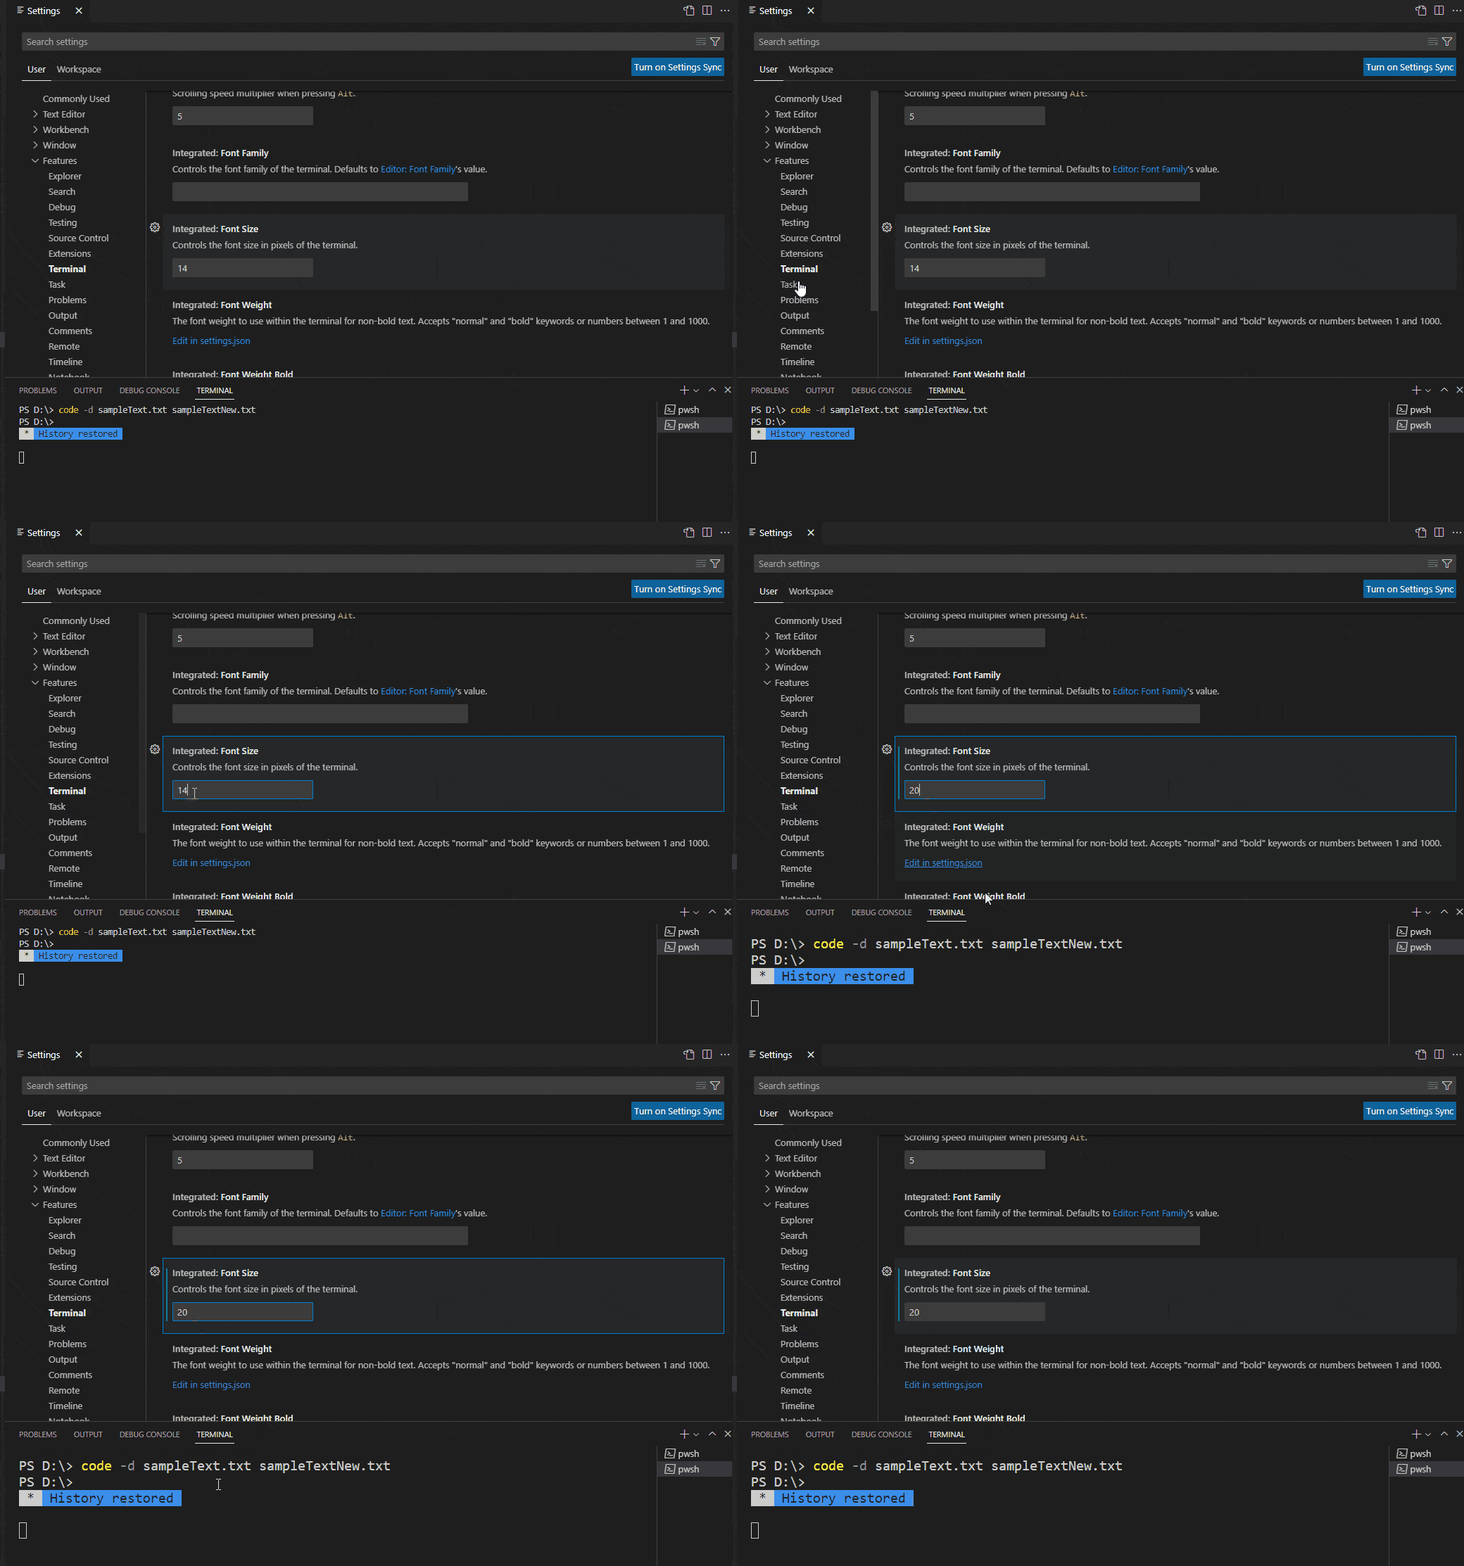
If you are working with Visual Studio (VS) Code Editor, it is very likely that you will use it's Terminal and somehow, you may want to increase VS Code Terminal Font Size or decrease it, so in this article, I have mentioned how we can change visual studio (vs) code terminal font size.
You can simply follow these steps to change or increase Terminal Font-Size in VS Code
- Open your Visual Studio Code Editor
- Click on "File" on tool-bar -> select "Preference" -> then select "Settings"
- In the left menu, click on "Features" and then select "Terminal"
- Now in Terminal Section, scroll down to "Font-Size", then size as needed, here is GIF sample

That's it, we are done as you can see from the above GIF image, the terminal font-size is changed as soon as you change number from 14 -> 20.
Using Command Palette
You can also change VS Code Terminal Font-Size using Command Palette, for that you will have to configure "settings.json"
- Open VS code
- Then Open "Command Palette" by clicking on "View" -> "Command Palette"
- Search for "Open Default Settings (JSON)"
- Once you have opened JSON, search for "terminal.integrated.fontSize" and then change it's value to desired font-value
// Controls the font size in pixels of the terminal. "terminal.integrated.fontSize": 14, - That should work.
You can also change other Terminal Settings like
terminal.integrated.fontFamily: It Refers to the terminal's font type. If you do not like the default font, you can update it to be another font on your machine.
terminal.integrated.fontWeight: Allows you to change font-weight of terminal fonts.
You may also like to read:
Show tabs and spaces in Visual studio code
