
If you have just started learning javascript, you may be assigned by someone to create a basic project of calculator using javascript, so in this article, I will provide you simple code of creating a calculator using javascript's eval function, which does the all work for you on a single button click.
The very first step is to look out for a header so each browser knows what to expect. Headers are not a part of this tutorial. However, you can find loads of information by typing 'HTML headers' into google. So copy the code below and paste it into a blank document and then save it as 'SimpleCalculator.html' in a folder called 'javascript-calculator'.
<!DOCTYPE html>
<html>
	<head>
	<title> Simple Calculation</title>
        <!--Include CSS/JS here, if there is any-->
        </head>
</html>
Now, we will be creating the main body part of the Calculator, so basically, we will be providing button 0-9 and all other mathematical operators buttons like Plus(+), minus(-), divide(/) & multiple (*)
Here is the form with table in which we are providing these buttons to user
<body>
    <form NAME="myForm">
        <table BORDER=2>
            <tr>
                <td align="center">
                    <input TYPE="text" ID="screen" NAME="screen" style="width:99%">
                    <br/>
                </td>
            </tr>
            <tr>
                <td>
                    <input TYPE="button" NAME="7" VALUE="  7  " onclick="updateTextbox(7)">
                    <input TYPE="button" NAME="8" VALUE="  8  " onclick="updateTextbox(8)">
                    <input TYPE="button" NAME="9" VALUE="  9  " onclick="updateTextbox(9)">
                    <input TYPE="button" NAME="+" VALUE="  +  " onclick="updateTextbox('+')">
                    <br>
                    <input TYPE="button" NAME="4" VALUE="  4  " onclick="updateTextbox(4)">
                    <input TYPE="button" NAME="5" VALUE="  5  " onclick="updateTextbox(5)">
                    <input TYPE="button" NAME="6" VALUE="  6  " onclick="updateTextbox(6)">
                    <input TYPE="button" NAME="-" VALUE="  -  " onclick="updateTextbox('-')">
                    <br>
                    <input TYPE="button" NAME="1" VALUE="  1  " onclick="updateTextbox(1)">
                    <input TYPE="button" NAME="2" VALUE="  2  " onclick="updateTextbox(2)">
                    <input TYPE="button" NAME="3" VALUE="  3  " onclick="updateTextbox(3)">
                    <input TYPE="button" NAME="*" VALUE="  x  " onclick="updateTextbox('*')">
                    <br>
                    <input TYPE="button" NAME="c" VALUE="  c  " onclick="reset();">
                    <input TYPE="button" NAME="0" VALUE="  0  " onclick="updateTextbox(0)">
                    <input TYPE="button" NAME="=" VALUE="  =  " onclick="result();">
                    <input TYPE="button" NAME="/" VALUE="  /  " onclick="updateTextbox('/')">
                </td>
            </tr>
        </table>
    </form>
</body>
In above HTML code, we have just added buttons for our user, with each line has 4 buttons and then <br/>, now if you have noticed we have also added javascript funciton, which we will call on button click
One of the main javascript function is updateTextbox(), which update's the textbox with id=screen on clicking a button, for example, if we click "5" on a calculator, updateTextbox(5) is called, which will add/append text "5" into the main screen using the following JS code
function updateTextbox(value){
		document.getElementById("screen").value += value;
}
The second important & most function will be the result(), which evaluates all the text data written in the screen textbox using javascript's Eval function
function result(){
		document.getElementById("screen").value = eval(document.getElementById("screen").value);
	}
the last JS function which we will be using is reset(), which clear's the screen textbox data
function reset(){
		document.getElementById("screen").value = '';
	}
so your complete JS code will be as below
<script type = "text/javascript">
	function updateTextbox(value){
		document.getElementById("screen").value += value;
	}

	function result(){
		document.getElementById("screen").value = eval(document.getElementById("screen").value);
	}

	function reset(){
		document.getElementById("screen").value = '';
	}
	</script>
which we will be placing just before </head> in the HTML, so your complete HTML code with calculator function's will be
<!DOCTYPE html>
<html>

	<head>
	<title> Simple Calculation</title>
	<script type = "text/javascript">

	function updateTextbox(value){
		document.getElementById("screen").value += value;
	}

	function result(){
		document.getElementById("screen").value = eval(document.getElementById("screen").value);
	}

	function reset(){
		document.getElementById("screen").value = '';
	}

	</script>
	</head>
	<body>
				<form NAME="myForm">
			<table BORDER=2>
				<tr>
					<td align="center">
						<input TYPE="text" ID="screen" NAME="screen" style="width:99%"><br/>
				</td>
				</tr>
				<tr>
					<td>
						<input TYPE="button" NAME="7"   VALUE="  7  " onclick="updateTextbox(7)">
						<input TYPE="button" NAME="8"   VALUE="  8  " onclick="updateTextbox(8)">
						<input TYPE="button" NAME="9" VALUE="  9  " onclick="updateTextbox(9)">
						<input TYPE="button" NAME="+"  VALUE="  +  " onclick="updateTextbox('+')">
						<br>
						<input TYPE="button" NAME="4"  VALUE="  4  " onclick="updateTextbox(4)">
						<input TYPE="button" NAME="5"  VALUE="  5  " onclick="updateTextbox(5)">
						<input TYPE="button" NAME="6"   VALUE="  6  " onclick="updateTextbox(6)">
						<input TYPE="button" NAME="-" VALUE="  -  " onclick="updateTextbox('-')">
						<br>
						<input TYPE="button" NAME="1" VALUE="  1  " onclick="updateTextbox(1)">
						<input TYPE="button" NAME="2" VALUE="  2  " onclick="updateTextbox(2)">
						<input TYPE="button" NAME="3"  VALUE="  3  " onclick="updateTextbox(3)">
						<input TYPE="button" NAME="*" VALUE="  x  " onclick="updateTextbox('*')">
						<br>
						<input TYPE="button" NAME="c" VALUE="  c  " onclick="reset();">
						<input TYPE="button" NAME="0"  VALUE="  0  " onclick="updateTextbox(0)">
						<input TYPE="button" NAME="="  VALUE="  =  " onclick="result();">
						<input TYPE="button" NAME="/"   VALUE="  /  " onclick="updateTextbox('/')">
					</td>
				</tr>
			</table>
		</form>
	</body>
</html>
In the above HTML code, we have simply added input type button elements, so we can have a numbers like we usually do in regular calculator.
And we have also added javascript events using "onClick=updateTextbox" method, which will help us to execute mathematical functions by passing number of expression to JS function "result".
You can also style buttons by giving them CSS, this step is optional but I am providing the CSS code below
input[type=button]
{
  display: inline-block;
    text-decoration: none;
    color: #fff;
    font-weight: bold;
    background-color: #538fbe;
    margin:10px ;
    font-size: 16px;
    border: 1px solid #2d6898;
    width:50px;
    text-align:center;
     background-image: linear-gradient(bottom, rgb(73,132,180) 0%, rgb(97,155,203) 100%);
    background-image: -o-linear-gradient(bottom, rgb(73,132,180) 0%, rgb(97,155,203) 100%);
    background-image: -moz-linear-gradient(bottom, rgb(73,132,180) 0%, rgb(97,155,203) 100%);
    background-image: -webkit-linear-gradient(bottom, rgb(73,132,180) 0%, rgb(97,155,203) 100%);
    background-image: -ms-linear-gradient(bottom, rgb(73,132,180) 0%, rgb(97,155,203) 100%);
    -webkit-box-shadow: 0px 3px 0px #2b638f, 0px 3px 10px rgba(0,0,0,.2);
-moz-box-shadow: 0px 3px 0px #2b638f, 0px 3px 10px rgba(0,0,0,.2);
box-shadow: 0px 3px 0px #2b638f, 0px 3px 10px rgba(0,0,0,.2);
}
Complete Output would be as below
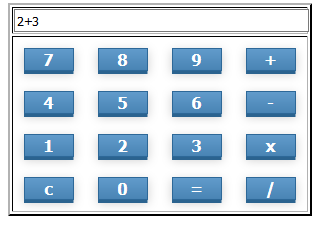
Gif image demo

Thanks for reading, feel free to ask any question's related to this in the comment section.
You may also like to read:
Autocomplete Textbox using Javascript (Multiple Methods)
Email Validation using Javascript
Best Javascript Charting Libraries
How to get user location using Javascript / HTML5 Geolocation?
 Buy us a coffee
 Become a Patron