
In the previous article, I provided an example for submit form using tag helpers in ASP.NET Core, but if you have started working in .NET Core and trying to submit form values to save data in database, then you must validate values before saving it into the database, to avoid getting any Exceptions or to avoid the error of character limit, when you pass text characters more than a SQL Server table column can accept.
So, to get rid of these errors we should validate form values using Model Validation in ASP.NET Core using Razor and C# code, before saving user-submitted values into the database.
Table of Contents
What is Model Validation and Model State in .NET Core MVC?
So, before begin on how to perform Model Validation in ASP.NET MVC Core, we need to understand what Model Validation is and what Model State is.
Model State: Model state can be divided into two-systems, Model Binding and Model Validation.
Model binding occurs, when you submit form from Razor page to C# Controller. Basically,when you submit form, with the help of Model Binding, different functions are executed, for example:
- Retrieves data from various sources such as route data, form fields, and query strings.
- Provides the data to controllers and Razor pages in method parameters and public properties.
- Converts string data to .NET types.
- Updates properties of complex types.
- So when you submit form data to Controller action, it automatically maps to the action parameter by the Model Binder.
Model Validation: Model validation occurs after model binding and reports errors where data doesn't conform to database rules, like for example, User tries to input value in form’s textbox with 60 characters while in database column maximum limit is 50 of characters.
If the data entered by user is not valid, then a response along with proper error message is sent back to the client where these messages are shown to the user so that those wrong data can be rectified.
So considering above example, when User tried to enter text which has more than 50 characters, we can show error message like "Maximum input limit is 50 characters" by specifying data annotation attribute "[StringLength(100)]" on Model property (we will see a complete example, later in this article.)
We can check if Model is valid or not using C# Code in Controller as shown below
public async Task<IActionResult> OnFormPost()
{
   //check if model is valid
   if (!ModelState.IsValid)
   {
   // if not valid return to page without saving data in database.
   return Page();
   }
   //else save values in DB
   _DBContext.Movies.Add(Movie);
   await _context.SaveChangesAsync();
   return RedirectToPage("./Index");
}
Validation Attributes in .NET Core MVC
Using above details, we have understood, that we need to use Model Validation before saving data into database, but how we can do that?
We can do it using Data Annotations in .NET Core MVC or you can say using Validation attributes, which let you specify validation rules for model properties.
Consider the below example, which allows you to save a User data in database, considering User table has two columns (Name and Email) in database
public class User
{
  [Required] //make this field required
  [StringLength(50)] // adds character limit = 50
   public string Name { get; set; }

  [Required] // make this field required
  [EmailAddress] // Validates that the property has an email format.
  public string Email { get; set; }
}
Built-In Validation Attributes with meaning
- Required- This validation attributes makes any property as required or mandatory.
- StringLength- This validation attributes validate any string property along with itslength
- Compare -This validation attribute basically compares the two property values in a model match
- EmailAddress- This validation attribute validates the email address format
- Phone- This validation attribute validates the phone no format
- CreditCard- This attribute validates a credit card format
- Range -This validation attributes any property to check it is exist within the given range or not.
- Url- This validation attributes validates the property contains an URL format or not
- RegularExpression- This validation attributes normally match the data which specified the regular expression format.
- Remote -Validates input on the client by calling an action method on the server.
Apart from above given Attributes, you can also create your own Custom Attribute for validation by creating a class that inherits from ValidationAttribute, and override the IsValid method.
To check the complete list of Data Annotation Validation Attribute, check this link https://docs.microsoft.com/en-us/dotnet/api/system.componentmodel.dataannotations?view=net-5.0
Model Validation Example Using Visual Studio
As we have understood how we can use Validation Attributes to implement Model Validation, let’s check a complete example using Visual Studio. I am using Visual Studio 2017 Community Edition which has .NET Core 2.1 but you can use same code in Visual Studio 2019 also with latest .NET Core version.
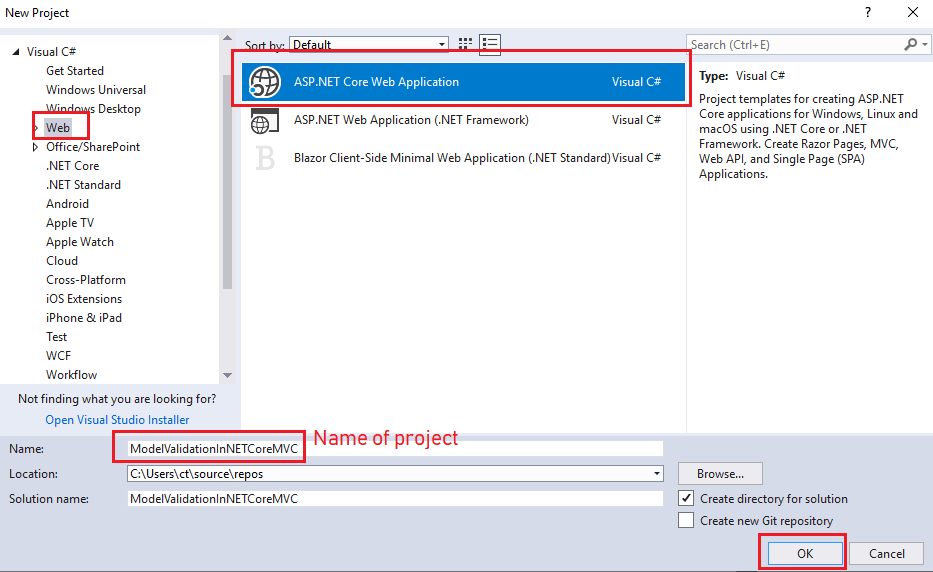
So, open VS 2017, Navigate to File-> New -> Project and then select "Web" From left-pane, select "ASP.NET Core Web-Application" from right-pane, give a name to your project (ModelValidationInNETCoreMVC) and then click "OK", as shown in the below image
In the Next-screen, choose "Web-application (Model-View-Controller)" as template and click "OK", so Visual Studio can auto-generate basic files for .NET Core MVC web-application.

Now, add a new class by right-clicking on "Models" folder, then select "Add" -> "New Item" -> Select "Code", name your new class as "User.cs" and use the below code

using System.ComponentModel.DataAnnotations;

namespace ModelValidationInNETCoreMVC.Models
{
    public class User
    {
        [Required] //make this field required
        [StringLength(50)] // adds character limit = 50
        public string Name { get; set; }

        [Required] // make this field required
        [EmailAddress] // Validates that the property has an email format.
        public string Email { get; set; }
    }
}
Once we have created the Model, we will navigate to "Views" -> "Home" -> "Index.cshtml", there you will see pre-generated Razor/HTML code, we will erase it and create a new form based on the User.cs Model Class.
@model ModelValidationInNETCoreMVC.Models.User

<form asp-controller="Home" asp-action="Index" method="post">
    <div asp-validation-summary="ModelOnly">
        <span>Please correct the following errors</span>
    </div>

    <div class="row">
        <div class="col-lg-4">Name</div>
        <div class="col-lg-8">
            <input asp-for="Name" placeholder="Enter your Name" autocomplete="off" class="form-control" />
            <span asp-validation-for="Name"></span>
        </div>
    </div>
    <br />
    <div class="row">
        <div class="col-lg-4">Email</div>
        <div class="col-lg-8">
            <input asp-for="Email" placeholder="Enter your Email Address" autocomplete="off" class="form-control" />
            <span asp-validation-for="Email"></span>
        </div>
    </div>
    <br />

    <div class="row">
        <div class="col-lg-offset-4 col-lg-8">
            <button type="submit" class="btn btn-primary">Save</button>
        </div>
    </div>

</form>
In the above code, we have created a form with the help of tag helpers in .NET Core MVC.
Now, navigate to "Controllers"-> "HomeController.cs", there you will see pre-generated code, but use the below code
using Microsoft.AspNetCore.Mvc;
using ModelValidationInNETCoreMVC.Models;

namespace ModelValidationInNETCoreMVC.Controllers
{
    public class HomeController : Controller
    {
        public IActionResult Index()
        {
            return View(new User());
        }

        [HttpPost]
        public IActionResult Index(User user)
        {
            if(ModelState.IsValid)
            {
                //yes Model is valid
                // write here code to save data in database
            }
            else
            {
                // if model has error's return view with Model
                // it will show error's
                return View(user);
            }

            return View(new User());
        }

    }
}
That’s it, we are done, build and run project in browser you will see output like below
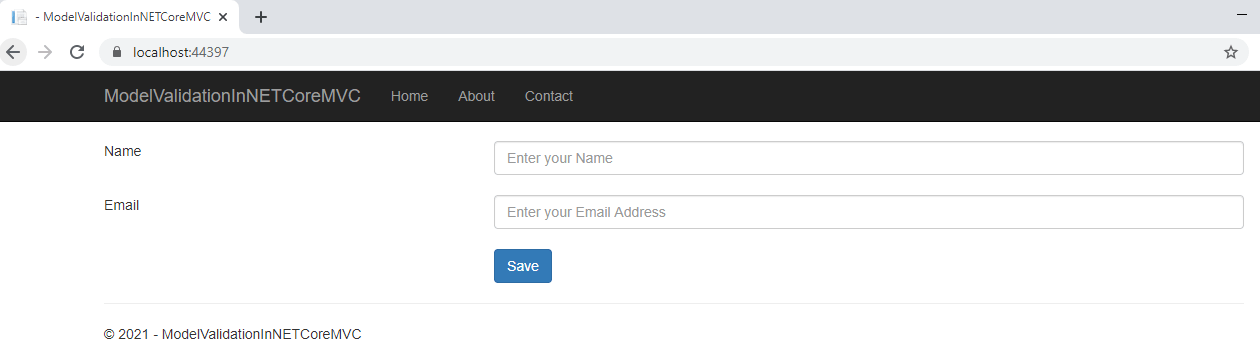
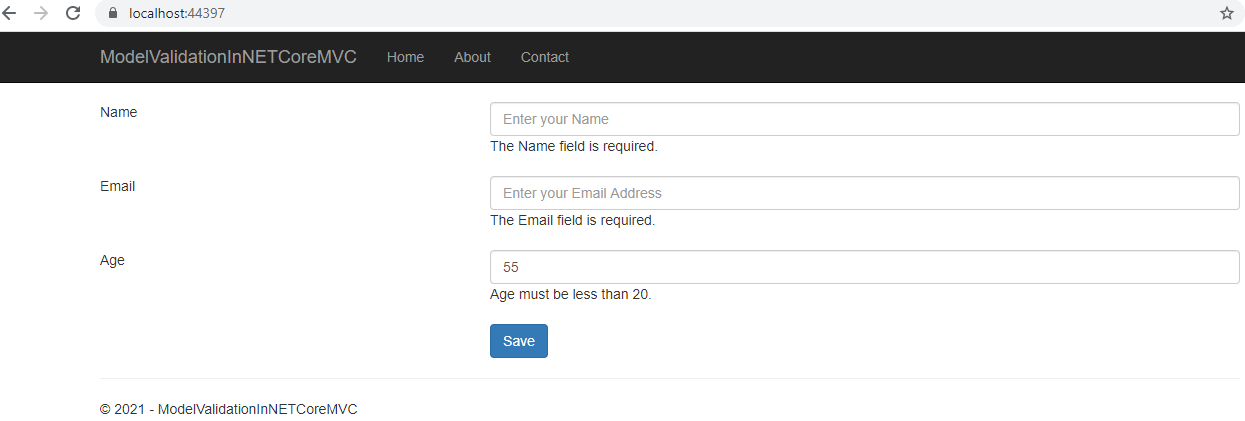
Now, if you will try to Click on "Save" button without adding any values, you will see validations error, here is the sample gif image.
If you will enter correct details like name and email id, then it will show "ModelState.IsValid= true" and then code to save data in database can be called, once you will enter correct values, you should see output like below gif

Creating Custom Validation with example
If none of the inbuilt attributes works for you, you can create your own custom Validation Attribute, by creating a class that inherits from ValidationAttribute, and override the IsValid method.
Suppose, you want to create a Custom Validation in which user must have "Age" below 20, so create a new property in "User.cs"
  [AgeBelowTwenty(20)]
  public int Age { get; set; }
Create a new class "AgeBelowTwenty" and then use the below code
using System;
using System.ComponentModel.DataAnnotations;


namespace ModelValidationInNETCoreMVC.Models
{
    public class AgeBelowTwenty : ValidationAttribute
    {
        public AgeBelowTwenty(int year)
        {
            Year = year;
        }

        public int Year { get; }

        //error message
        public string GetErrorMessage() => $"Age must be less than 20.";

        protected override ValidationResult IsValid(object value, ValidationContext validationContext)
        {
            var user = (User)validationContext.ObjectInstance;

            //condition to show error
            if (user.Age >= 20)
            {
                return new ValidationResult(GetErrorMessage());
            }

            //success
            return ValidationResult.Success;
        }
    }
}
Now inside "Index.cshtml", add below HTML to show "Age" textbox to user in form
   <div class="row">
        <div class="col-lg-4">Age</div>
        <div class="col-lg-8">
            <input asp-for="Age" placeholder="Enter age" autocomplete="off" class="form-control" />
            <span asp-validation-for="Age"></span>
        </div>
    </div>
    <br />
Build and run project, you will see output like below if you try to enter Age above or equal to 20
That's it, we are done with Model Validation in ASP.NET Core MVC, if you have any questions feel free to ask it in comment's section.
You may also like to read:
File Upload in ASP.NET Core MVC (Single or Multiple)
Import Excel in SQL Server database using ASP.NET Core MVC
 Buy us a coffee
 Become a Patron